Why your crochet edges drift—and what to check
A calm checklist for missing stitches, surprise increases and edges that gradually grow or shrink.
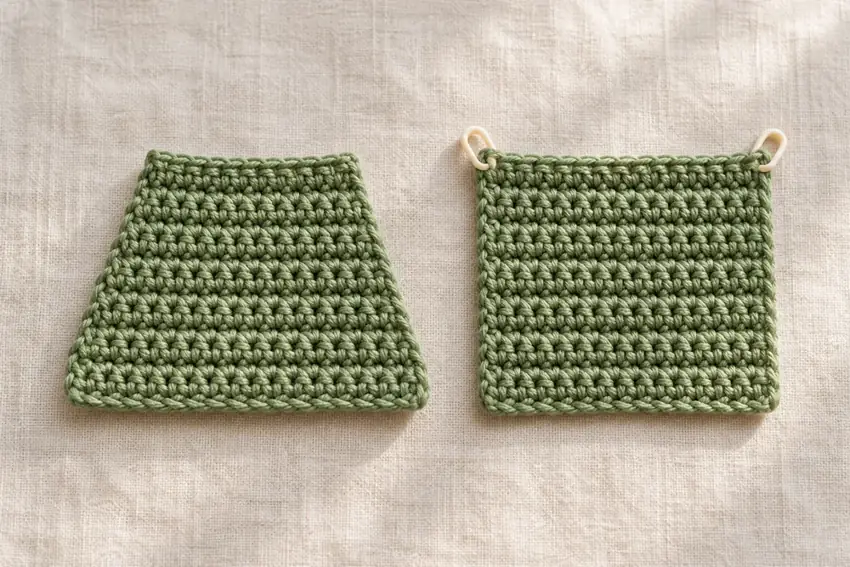
Use the stitch count as your first clue
An uneven edge does not always mean uneven tension. If a rectangle keeps getting wider or narrower, count the stitches before changing your hook. Unintentionally adding or missing edge stitches is a common cause. Compare your count with the pattern at the end of each row, especially while learning a new stitch.
This guide is for simple work in rows. Shaping, decorative borders, stitch patterns and some yarns can create edges that look different on purpose. Use the pattern’s construction notes to decide whether the change is expected.
Find the top of a completed stitch
In many basic crochet stitches, the top looks like a small V formed by two loops. These top loops are useful landmarks for counting across a row. Unless the instructions say otherwise, a stitch is commonly worked under both top loops. The loop on your hook is not a completed stitch in the row.
Chains and taller stitches can be harder to recognize at an edge. Slow down, turn the fabric toward the light and gently separate the loops. Avoid pulling hard enough to stretch the fabric while counting. A smooth, light-colored practice yarn makes these landmarks easier to see.
Mark the first and last stitches
Place a removable marker through the top of the first completed stitch, then mark the last completed stitch. On the following row, those markers help you locate the edges. Move the markers as you make the new edge stitches. If a turning chain counts as a stitch, mark it according to the pattern’s instructions instead.
This is particularly helpful when a last stitch folds down the side and seems to disappear. It also stops you from treating an extra loop at the edge as another stitch. Markers are a learning aid, not a sign that you should already be able to manage without them.
If the piece is growing wider
Check whether you are working twice into the first stitch, counting a turning chain and also adding an extra stitch beside it, or inserting a stitch into an unintended space at the end. A repeat placed in the wrong location can also add stitches. Identify the first row where the count changed, rather than guessing from the current width.
If increases are intentional, compare their placement as well as the total. A correct total does not guarantee a correct repeat: an accidental increase and decrease can cancel each other numerically while changing the texture.
If the piece is getting narrower
Look for a missed first or last stitch, a turning chain that should have been worked, or a stitch skipped in the middle. Count in small groups and use temporary markers between groups if that helps. Read the row instruction again before assuming the yarn is the problem.
When the stitch count is correct but the width changes, compare your loop sizes and grip. A tighter later section can pull the fabric inward. Changes in hook size, yarn or stitch pattern also affect width. Measure the fabric resting flat rather than stretched.
Fix the cause before hiding the edge
For an unintended shaping error, undo the work to the last correct row and remake the affected section. Take a photo or note before undoing so you know what changed. A border can tidy an edge, but it does not reliably fix incorrect stitch counts or a distorted shape.
Some curling is related to stitch structure, yarn and finishing rather than a counting error. Follow the project’s finishing and care instructions, and test any blocking method on a swatch. Practice a small rectangle until you can keep its count consistent; it is a useful foundation for larger work.
Find the first row where the count changes
Suppose your practice rectangle should have 24 single crochets per row. Count the latest row, then work backward through visible rows until you find the first transition from 24 to 23 or 25. Inspect that row’s first and last stitches before undoing a large section.
A missing last stitch commonly makes an edge narrow, while working into a turning chain that is not meant to count can add width. These are possibilities, not a diagnosis from shape alone. Mark the first and last real stitches in the next practice row and compare the written turning-chain rule.
Separate the count from the fabric shape
If every row still has the correct count, check tension, the starting chain and how the piece is lying. A tight foundation can pull one edge inward without changing the stitch count. Blocking cannot replace a missing stitch or correct a repeated counting error.
For a repeat-based pattern, count repeats as well as individual stitches. Write a short tally at a checkpoint and restart from the first stitch if interrupted rather than guessing which part you already counted.