A little texture: back-loop ribbing
An 18-row practice strip that introduces back-loop single crochet while keeping a simple 12-stitch count.
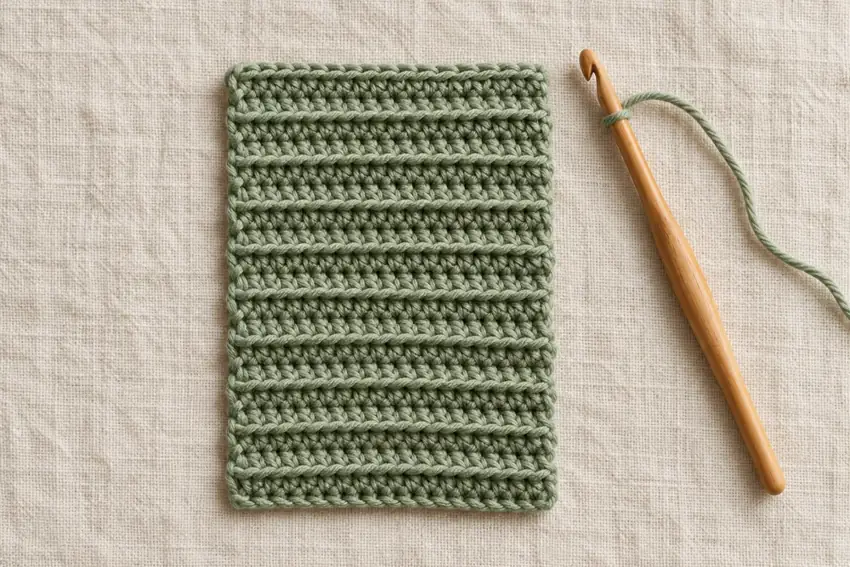
Try a new texture on a small scale
Once a plain single crochet rectangle feels familiar, change where you insert the hook. This original exercise starts with a standard foundation row, then uses back-loop-only single crochet for a simple ribbed texture. You still make one stitch in each stitch; the loop choice changes, not the count.
This is an untested practice-pattern draft, checked for written stitch-count consistency. It has not been physically made or measured. It is not a pattern for a fitted cuff, headband or other finished accessory. Use it to explore texture before applying the idea to a size-specific project.
What you will need
Use a small amount of smooth, solid-color yarn, a matching hook in the label’s recommended range, two removable markers, scissors and a blunt yarn needle. A light or medium color helps you distinguish the two top loops. No finished size or yarn quantity is guaranteed in this practice draft.
Skills to know: slip knot, chain, US single crochet and turning rows. Complete the plain practice rectangle first if your edge count is still changing from row to row.
Understand back loop only
Look at the top of a stitch as you are about to work into it. You will usually see a V made from two loops. The front loop is the one closer to you; the back loop is farther from you. For BLO single crochet, insert the hook under only the farther loop, then complete an ordinary single crochet.
After turning, identify the loops from your new working position. Do not keep choosing a loop based on which side of the strip faced you on the last row. The unworked front loops create visible ridges in the fabric. Work into actual stitches, not the spaces between them.
- US terms: ch = chain; sc = single crochet; BLO = back loop only.
- Foundation: chain 13.
- Every row: 12 single crochets.
- The chain-1 turning chain does not count as a stitch.
- Row 1 uses the foundation chains; rows 2–18 use BLO in every stitch, including edge stitches.
Row 1: an ordinary beginning
Chain 13, excluding the loop on the hook from the count. Make one single crochet in the second chain from the hook and one single crochet in each remaining chain. You should have 12 single crochets.
Mark the first and last completed stitches. This foundation row does not use a BLO instruction: you are working into chains. Keep the foundation chain relaxed enough to insert the hook without forcing it.
Rows 2–18: work into the farther loop
For row 2, chain 1 and turn. Single crochet into the back loop only of the first stitch, then into the back loop only of each remaining stitch across. Work the last marked stitch the same way. Do not work into the turning chain. Count: 12 single crochets.
Repeat the row-2 instruction for rows 3 through 18. Each time you turn, locate the current back loops before continuing. Move the first and last stitch markers. The edge stitches use BLO too in this exercise; some finished patterns use a different edge treatment, so do not assume this convention applies to every ribbing pattern.
Pause after a few rows and look for the ridges. If one section looks flat, check whether you accidentally worked under both loops there. Correct that section if you want consistent texture, even if the total stitch count is still 12.
Finish and compare your two fabrics
After row 18, cut the yarn leaving a workable tail, pull the tail through the last loop and secure it gently. Weave the ends through the fabric without stretching or gathering the strip. Remove your markers and lay it flat.
Record the relaxed width and length. Gently compare the feel of this fabric with a plain single crochet sample made in the same yarn and hook size. Texture and stretch depend on the yarn, tension and direction of the fabric; this exercise does not establish a fit or recovery standard for a wearable.
Keep a note of where BLO is used, your final row count and any rows you remade. When you later follow a finished ribbed pattern, follow its gauge, measurements, edge instructions and joining method instead of scaling this sample by eye.