Project overview
- Skill level
- Intermediate · US terminology
- Finished size
- Twenty squares targeted at 10 × 10 in (25.4 × 25.4 cm), arranged four across and five down: approximately 40 × 50 in (101.6 × 127 cm) before joining. Seams may reduce that slightly; final measurements await a made sample.
- Gauge
- One washed, relaxed 8-round granny square = target 10 in (25.4 cm) per side. Square size, rather than a generic dc swatch, controls the layout. Make a complete sample square before committing to all twenty.
- Testing status
- Written draft — maker testing pending
Materials & tools
- Category 4 / medium-weight yarn: plan approximately 2,000 yd (1,829 m) total, divided into 1,000 yd sage and 1,000 yd ivory, including sampling and joining. These are unmeasured planning amounts, not a tested consumption figure.
- A 5 mm hook as a starting point; change size after the full eight-round sample square. Use the same yarn range for both colors.
- A large blunt yarn needle, scissors, removable markers or numbered paper labels, measuring tape and a suitable flat blocking surface.
Abbreviations & stitch notes
- US terminology throughout: ch = chain; sl st = slip stitch; sc = single crochet; dc = double crochet; st / sts = stitch / stitches; sp = space; RS / WS = right / wrong side.
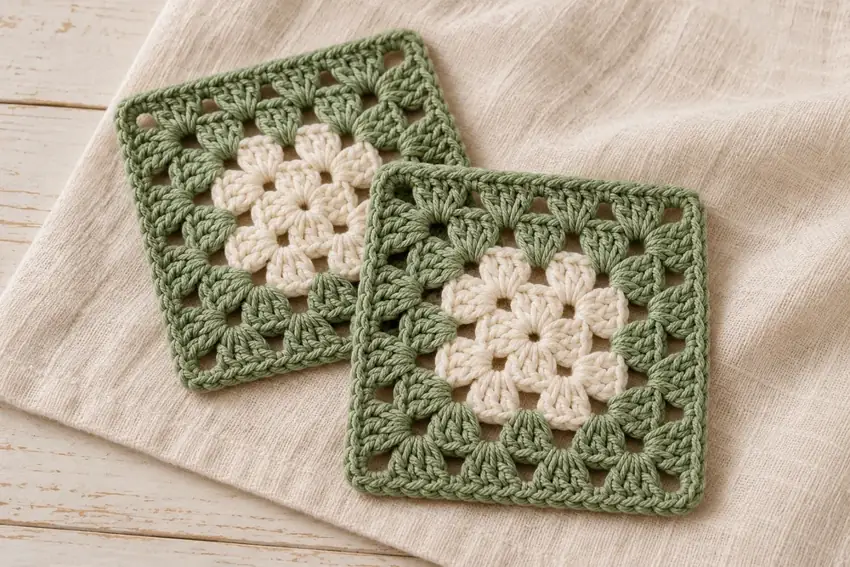
- A granny group is 3 separate dc worked into one indicated space; it is not a cluster closed together. A corner is (3 dc, ch 2, 3 dc) in one corner space.
- In granny rounds the starting ch 3 counts as the first dc. Joining and travel slip stitches never count as additional stitches. Work joined rounds without turning.
For a refresher, use our chain and single crochet lesson, double crochet lesson, or US / UK terminology referenceCalculate stitches from your gauge →.
Let's make it, step by step.
Read the full pattern once before starting. Optional checkboxes help you follow the sequence for this page view only.
- One full 8-round sample
Use sage or ivory. Work the eight granny rounds below, weave tails and wash the sample as the yarn label allows. Its relaxed target is 10 in square. Adjust the hook and remake the sample if needed. An acceptable sample may count as the first of its color.
- 4 groups; 12 dc; 4 corner spaces
Ch 4 and sl st in the first ch to make a ring. Ch 3 (counts as the first dc), work 2 dc in the ring, ch 2. Work (3 dc in the ring, ch 2) three times. Join with a sl st to the top of the starting ch 3. Do not turn. Mark all four ch-2 corner spaces. After every later round, move the markers to the four newly made ch-2 corner spaces.
- 8 groups; 24 dc; 4 ch-1 spaces; 4 corners
Sl st in the next 2 dc, then sl st into the next ch-2 corner space. Ch 3, 2 dc, ch 2, 3 dc in that same corner. Ch 1. Work (3 dc, ch 2, 3 dc) in the next corner, ch 1; repeat that corner-and-ch-1 sequence twice more. Join to the top of the starting ch 3. Do not turn.
- Round 8: 32 groups / 96 dc
For each new round, sl st across the next 2 dc and into the next ch-2 corner. In that corner work ch 3, 2 dc, ch 2, 3 dc. Ch 1. Along the next side, work (3 dc in the next ch-1 space, ch 1) in every existing ch-1 side space. In the next corner work (3 dc, ch 2, 3 dc), then ch 1. Repeat across the next two sides and corners in the same way. After the fourth corner, work the last side’s (3 dc, ch 1) repeats, then join to the top of the starting ch 3. Do not add a fifth corner and do not turn. In round r, each side uses r−2 existing ch-1 spaces; round 3 therefore has one such space per side. Work through round 8 in the same solid color. Check totals: round 3 = 36 dc / 8 ch-1 spaces; round 4 = 48 / 12; round 5 = 60 / 16; round 6 = 72 / 20; round 7 = 84 / 24; round 8 = 96 / 28. Every round also has four ch-2 corner spaces. Fasten off after round 8.
- 10 sage + 10 ivory = 20 squares
Repeat the full eight-round square instructions until you have exactly ten sage squares and ten ivory squares, counting the sample if used. Keep each square one solid color. Check eight rounds and four corners on every square before weaving tails.
- 4 columns × 5 rows
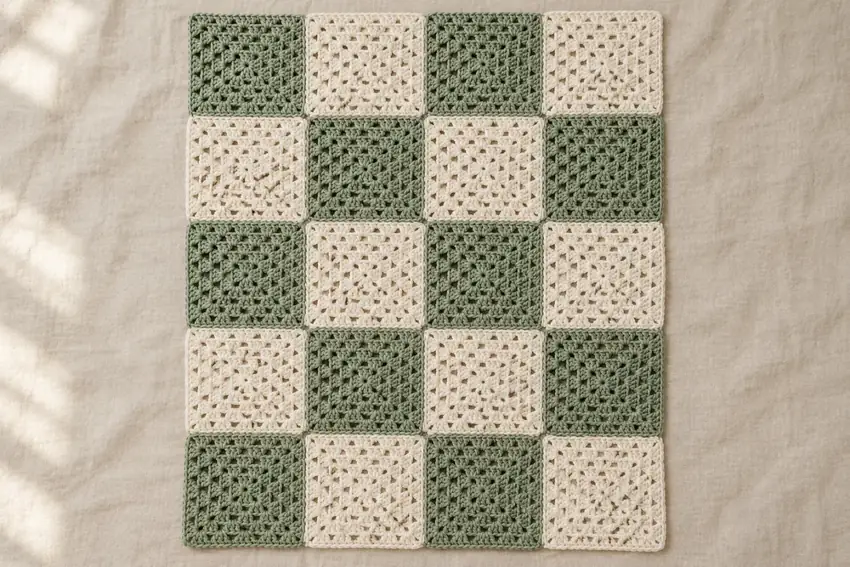
Wash and dry all motifs consistently. Shape each gently to the same 10-in square; reject an overstretched square rather than forcing it to size. Lay RS up in five horizontal rows of four squares. Top row: sage, ivory, sage, ivory. Row 2: ivory, sage, ivory, sage. Repeat the top row for rows 3 and 5; repeat row 2 for row 4. Label row and column positions before lifting pieces.
- 3 joins per row × 5 rows = 15 joins
For each row, put adjacent squares WS together, keeping their marked top edges aligned. With a blunt needle and sage yarn, whipstitch from the upper corner to the lower corner through both outer top loops of corresponding dc and through corresponding ch-1 links. At each end, catch the two corner ch-2 spaces together once to anchor the junction. Do not crochet or sew through an entire group as if it were one stitch. Keep the seam relaxed. Open the joined squares flat, RS up, and join the next square in the same way.
- 4 long row joins
Place rows 1 and 2 WS together, matching the entire long edge, square corners and existing seam junctions. Whipstitch the corresponding dc and ch-1 edge links across each square; anchor corresponding corner spaces at the junctions without adding a knot at every corner. Repeat to attach rows 3, 4 and 5 in order. At each four-square crossing, take a small additional pass through the neighboring corner spaces if needed to close a gap without gathering.
- 20 motifs, visible sage seams, no border
Open the throw flat and inspect every seam from both sides. Secure and weave joining tails in more than one direction through stitch backs. This design stops at the joined outer square edges: do not add a border or fringe. Wash and dry by the yarn label, lay flat to settle, and record the final measurements.
Construction, finishing & helpful notes
A checkerboard that stays balanced
Five rows of four squares give twenty squares. Every row contains two sage and two ivory squares, so ten of each color are needed even though the number of rows is odd.
Keep a photograph or numbered diagram of the laid-out grid before joining. An accidentally rotated monochrome square does not change color placement, but its top-edge marker helps you keep the seam direction consistent.
A reliable count for every motif
A completed granny round r contains 4r groups and 12r dc, including its starting ch 3. There are four ch-2 corners and 4(r−1) side ch-1 spaces. An eight-round square therefore has 32 groups, 96 dc and 28 side ch-1 spaces.
Two neighboring square edges should present identical stitch and chain sequences. If they do not, check the round count and corners before trying to ease the mismatch into a seam.
Join without shrinking the whole blanket
The approximately 40 × 50 in layout is calculated from four and five 10-in motifs. A tight joining strand can make the final throw smaller and ridge the surface. Open each completed join flat before continuing.
Whipstitch through corresponding edge loops with relaxed tension. Pulling each stitch hard can make a cordlike seam. If a seam draws two corners together, remove that section and rejoin it with the motifs lying flat.
Resolve shape differences at the square stage
A square that cups may be missing a corner group or side group; a ruffled one may have an extra. Verify counts before changing the hook. A slightly spiral appearance can occur when working granny rounds without turning; gentle consistent shaping helps, but does not replace a test square.
Do not block one motif drastically larger to match the rest. Use the same yarn family and hook strategy for all squares and compare each new motif with the washed sample.
Adapt the layout before making more squares
You can change the number of columns and rows without changing the eight-round motif instructions. Multiply the actual washed square width by the chosen counts to estimate the new layout; allow for seams.
Plan the color grid on paper first, then count how many squares of each color it needs. More motifs require more yarn and joining yarn; the original unmeasured allowance does not cover every enlargement.
Video help for the techniques
These external tutorials explain stitches or finishing used in this recipe. Follow this page for the project's exact counts, placement and assembly.
How to Crochet a Foundation Chain — Yarnspirations / Red Heart Design Team ↗How to Double Crochet (DC) — Yarnspirations / Red Heart Design Team ↗Weave In Ends in Crochet — Yarnspirations ↗Browse all technique references →Explore the Beyond the Basics collection →
Keep your next make a little easier.
Save yarn, hook, gauge and measurement notes using our free starter checklist.
Open the free checklist ↗