Project overview
- Skill level
- Easy · US terminology
- Finished size
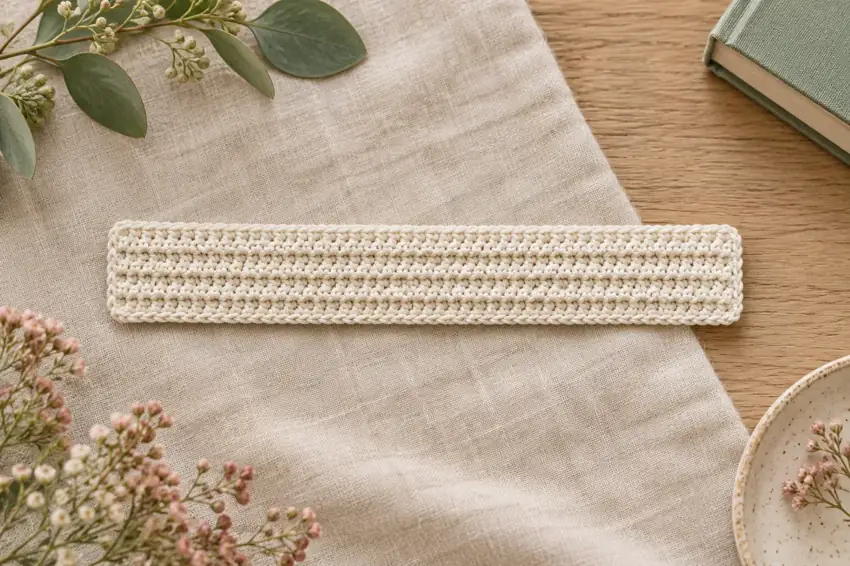
- Approximately 8 × 1.45 in (20.3 × 3.7 cm) at the target gauge; measured sample pending.
- Gauge
- Target: 20 single crochets and 22 rows = 4 in (10.16 cm), worked in back-loop-only single crochet and measured relaxed after the yarn's recommended wash and dry treatment.
- Testing status
- Written draft — maker testing pending
Materials & tools
- Smooth category 3 / light-weight cotton yarn. Plan about 30 yd (27 m), plus additional yarn for a separate gauge sample. This is an untested planning allowance, not measured consumption.
- A 3.5 mm crochet hook as a starting point; adjust to obtain a comfortable fabric and the target gauge.
- Two removable edge markers, optional extra markers for counting groups of ten, scissors, a blunt yarn needle and a ruler.
- Save the yarn label to check its care instructions before finishing.
Abbreviations & stitch notes
- US terminology throughout.
- ch = chain
- sc = single crochet
- BLO = back loop only
- st / sts = stitch / stitches
For a refresher, use our chain and single crochet lesson, double crochet lesson, or US / UK terminology referenceCalculate stitches from your gauge →.
Let's make it, step by step.
Read the full pattern once before starting. Optional checkboxes help you follow the sequence for this page view only.
- 41 chains
Make a slip knot and chain 41. Exclude the live loop on the hook when counting.
- 40 sc
Single crochet in the second chain from the hook and every remaining chain. This is an ordinary foundation row worked into chains, not a BLO row. Mark the first and last completed single crochets.
- 40 sc in BLO
Chain 1 and turn; the chain does not count. Single crochet in the back loop only of each stitch across, beginning with the first marked stitch and ending with the last. Move the markers and count.
- 40 sc per row; 8 rows total
Repeat row 2 for six additional rows. Identify the farther top loop after each turn. Work BLO in every stitch, including both edge stitches, and do not work into the turning chain.
- 8 completed rows
After row 8, cut the yarn with enough tail for weaving. Draw the cut tail completely through the last live loop and gently secure it. Do not add another row.
Use a blunt yarn needle to weave the tails through supported stitch paths, changing direction where possible without gathering the strip. Remove markers, follow the yarn's wash and dry instructions, let it dry completely and record the relaxed measurements.
Construction, finishing & helpful notes
A small gift idea built along its length
Work along the long edge: 40 stitches create the length and eight rows create the width. There is no tassel, charm or separate border. Focus on finding the back loop and maintaining a steady count.
This original draft has not yet been crocheted, washed or tested inside a book. The finished dimensions are calculated from a target gauge, and the mix of one plain foundation row with seven BLO rows can affect the actual measurement. Make a small sample first and choose a thin, flexible fabric rather than assuming every cotton will lie comfortably between pages.
Choose a yarn that keeps the strip slim
A smooth light-weight cotton helps the ridges stay visible without adding a bulky decorative surface. Avoid thick knots, beads or fringe for this version. Different cottons can produce noticeably different thicknesses, even when their labels share the same category. The hook size is a starting suggestion, not a guarantee of the intended fabric.
Use the gauge statement to check the long dimension if it matters: 40 stitches at 20 stitches per 4 inches gives 8 inches. Eight rows at 22 rows per 4 inches calculates to about 1.45 inches, with the foundation row making the actual width approximate. Record the relaxed finished dimensions rather than stretching the strip to fit those targets.
Find the back loop after every turn
Look at a stitch from your current working position. Its top usually looks like a small V. The front loop is closer to you; the back loop is farther away. For BLO single crochet, insert the hook under only that farther loop, yarn over and draw up a loop, then yarn over and pull through both loops on the hook.
Turn the work before deciding which loop is now the back loop. Do not keep choosing a side based on which face was toward you on the previous row. The unworked front loops form the surface ridges. In this pattern, the first and last stitches also use BLO from row 2 onward.
Troubleshoot texture and shape separately
A flat-looking patch with the correct stitch count may mean you accidentally worked through both loops instead of BLO. Inspect the unworked front loops before adding rows. If the strip gets shorter from one long row to the next, check for a missed edge stitch first, then compare tension.
If the first long edge draws inward, remake the starting chain with more relaxed loops. A different hook for the foundation chain can be explored on a sample, but record the change. Do not conceal an unexplained count error by adding a stitch at the end of the next row; return to the last correct row so the texture and edges stay consistent.
Finish gently and check before gifting
Weave the tails through the backs of stitches without creating a thick lump. Gently flex the strip to settle the woven yarn, then follow the yarn label's care instructions. Let it dry completely while arranged flat. Avoid direct ironing or steam unless the yarn manufacturer permits that treatment.
Try the dry bookmark in a book you use yourself before giving it away. If the fabric feels too bulky for the intended pages, choose a finer yarn and make another sample; the dimensions and yarn allowance will then change. Include a short care note when gifting, and keep the successful yarn and hook details for the next bookmark.
Video help for the techniques
These external tutorials explain stitches or finishing used in this recipe. Follow this page for the project's exact counts, placement and assembly.
How to Single Crochet (SC) — Yarnspirations / Red Heart Design Team ↗Weave In Ends in Crochet — Yarnspirations ↗Browse all technique references →Keep your next make a little easier.
Save yarn, hook, gauge and measurement notes using our free starter checklist.
Open the free checklist ↗